Mark Making Tray for Preschoolers

20160913-170552.jpg

This is a simple, yet engaging invitation to work on developing fine motor skills.

20160913-170621.jpg

All you need is a small chalkboard (we use one from Handwriting Without Tears), a bit of water, and some cotton swabs.

20160913-170607.jpg

You can draw whatever shapes you want on the chalkboard, and then let the child “draw” with the wet cotton swab to erase the marks. On my chalkboard I have drawn a cross, a circle, and a zig zag line.

Math Invitation: Fractions

I love the concept of setting up “invitations” for my kids to discover and explore.  Usually these are related to art or sensory projects, but they work well for math or literacy too. 

I set up a math invitation every morning for Trevor, and a fine motor invitation every afternoon. He craves routine, and so these set invitations work well for him. Plus, it gives me some free time while he does independent work.

For this invitation I set out two bowls, each containing a fraction circle. Below the bowls I set out cards with the fractions he’s to make himself. And finally, at the bottom of the setting are two blank circles for him to fill in with the fractions shown on the cards.

You can find the free fraction flash cards here: https://www.teacherspayteachers.com/Product/Fraction-Flash-Cards-203074

The fraction circles you can buy here: http://www.didax.com/shop/productdetails.cfm/ItemNo/2-485/src/214/?gclid=CIiaiu2c5McCFUGUfgodaPcJ5Q

(The two bottom “fill in” circles I cut out of craft foam myself. You could also simply trace circles on a piece of cardstock or paper.)


X is for eXplore: Your State Parks

I’m excited to be taking part in the ABC’s of Nature Collaboration Series with 25 other amazing kid bloggers!  Thanks to School Time Snippets for coordinating this wonderful series.  I hope you go check out all of the other posts and are inspired to get outside and enjoy the natural environment with your kids!  🙂

ABC14

My kids love to get outside and eXplore, which is why I chose to share about this topic.  A fantastic place to go eXploring with your kids is at one (or more!) of your state parks.  State Parks are fabulous resources, full of majestic treasures to discover.  You can…

Pick Wildflowers:

Pick Wildflowers

Play Peek-A-Boo:

Nature Peek-a-Boo

Dig in the Dirt:

Dig in the Dirt

Look for Bugs:

bugs

ABC5

Hike the Trails:

Hike with Kids

ABC7

Learn About Local Plant Life:

Fern

ABC9

eXplore Trees and Fallen Logs:

explore a tree

fallen log

And of Course, Play With Sticks!

sticks

I really hope you are inspired to check out one of your local state parks this summer!  To find a State Park near you, check out the links below:

Alabama / Alaska / Arizona / Arkansas / Colorado / California / Connecticut / Delaware / Florida / Georgia / Hawaii / Idaho / Illinois / Indiana / Iowa / Kansas / Kentucky / Louisiana / Maine / Maryland / Massachusetts / Michigan / Minnesota / Missouri / Montana / Nebraska / Nevada / New Hampshire / New Jersey / New Mexico / New York / North Carolina / North Dakota / Ohio / Oklahoma / Oregon / Pennsylvania / Rhode Island / South Carolina / South Dakota / Tennessee / Texas / Utah / Vermont / Virginia / Washington / West Virginia / Wisconsin / Wyoming

ABCs Nature Icon

Peek-a-Boo Sensory Board

I knew that I wanted to do a fun project involving the tops from baby wipes containers ever since I saw this post from I Can Teach My Child on Pinterest.  I started saving wipes lids and was inspired to create this Peek-a-Boo Sensory Board while wandering the aisles at Home Depot. 20140625-130952.jpg I picked out flooring samples for both indoor and outdoor carpet, as well as linoleum.  When I got home I flipped the samples over and traced the outline of the inside of the wipes lids on the backs of the samples with a Sharpie.  I cut along the outline so they fit perfectly inside! I grabbed a partial piece of foam board and moved the wipes lids around until I was happy with the layout.  Then I simply grabbed my trusty hot glue gun and glued the wipes lids to the foam board.  Finally, I glued the cut pieces of the flooring samples inside. 20140625-131012.jpg When I first presented Paige with the Sensory Board I laid it on the floor.  She had a great time exploring the textures with both her hands and feet!  Later I ended up mounting it to the wall with some Command strips for a little change. 20140625-131036.jpg Paige has really enjoyed exploring this sensory board.  It’s a great way for her to learn about textures and colors too! I just love a simple (and practically free!) project 🙂

EDITED TO ADD:  I have had many people asking about the brand of wipes I used for this project. They are Kirkland wipes found at Costco.

Recycled Fruit Box Fine Motor

I love using recycled materials for our fine motor activities.  I have the hardest time trashing or recycling something before reusing it!  I was going to recycle the cardboard box that our delicious local summer fruit comes in, when I noticed the air holes on the bottom.  I knew they’d be the perfect size for some fine motor work 🙂

20140621-164545.jpg

I flipped the box upside down and presented that along with a bowl of marbles for Trevor to balance in the holes.  It was a great way to work on his pincer grasp and hand control.

20140621-164744.jpg

Our activity table is a five dollar garage sale find, so it has a slight slant.  We ended up moving the activity to the floor to get a more supportive surface for the box.

20140621-164826.jpg

This was a fun, frugal fine motor activity.  What materials do you love to upcycle?

Styrofoam Fish Fine Motor Tray

If you’re looking at adding in more fine motor activities to your kids’ days, my biggest suggestion would be to save everything!  LOL 🙂  I am always saving items that would normally be recycled or trashed and re-purposing them for these activities.

For this fine motor tray I used a piece of Styrofoam that I’d saved from some packaging.  I simply drew a picture of a fish on the Styrofoam using markers.  Along the outline of the fish I added dots about every inch, so that Trevor had targets for sticking the cocktail forks.  I placed the drawn Styrofoam fish on a tray with some plastic cocktail forks that I picked up at the Dollar Tree (you could also use toothpicks or even push pins).

20140617-145805.jpg


Pushing the cocktail forks into the Styrofoam is a great fine motor exercise.  Having targets for him to aim at helps with hand-eye coordination.  You really could draw any picture you wanted to on the Styrofoam (or a word like I did here), but since we’re doing an Ocean Unit Study this summer, I kept it thematic to that.

20140617-145822.jpg

What are your kids wanting to learn about this summer?

Hang It Up!

This isn’t a new idea, but it is a great one. Set up your kids with their own clothesline. It’s a wonderful way to work on fine motor skills, and have fun at the same time!

20140609-132825.jpg

I strung up some twine in our playroom, and then provided Trevor with an invitation to hang up paper t-shirts with wooden clothespins.

20140609-133038.jpg

I found these shirts as part of a teacher’s back-to-school packet on clearance for $1, but you could easily just make some yourself out of cardstock or construction paper.

20140609-133249.jpg

I had to demonstrate to Trevor how to use both hands to hang up a shirt on the clothesline, but after that he only needed a little verbal prompting. I was very impressed with how well he did with this!


What is your favorite clothespin activity?

Fine Motor Friday: Put a Cork in It!

In case you needed an excuse to drink more wine…

Save those wine corks! They have so many possibilities for uses in kids projects. All you need for this great fine motor activity are some wine corks and pieces of cut up pool noodle (which you will also fine a million uses for).

20140606-132643.jpg

I presented this activity simply by offering a bowl full of corks and some pool noodle pieces set out on Trevor’s activity tray (aka a cookie sheet from the Dollar Tree 😉 ). I then invited him to put the corks inside the pool noodles. This is a great way to work on bilateral coordination, as the child has to use both hands to do this. Trevor had a lot of fun with this 🙂 You could also make this into a pegging-type game, where you stack pool noodles and corks together to see how tall you can make a tower. Trevor opted not to try that though. I always give him choices when we do an OT type activity.

20140606-132741.jpgWhat are your favorite uses for pool noodles outside of the pool?


DIY Outdoor Reading Den for Kids

My kids love books and they love being outside, so I thought, “Why not combine the two?”  Given their fair skin we tend to play in the shade, so I decided to make them a cozy little outdoor hideaway where we could snuggle up and enjoy a few books.  The best part?  You can make it with items found at the Dollar Tree!  I love me a good frugal DIY project 🙂

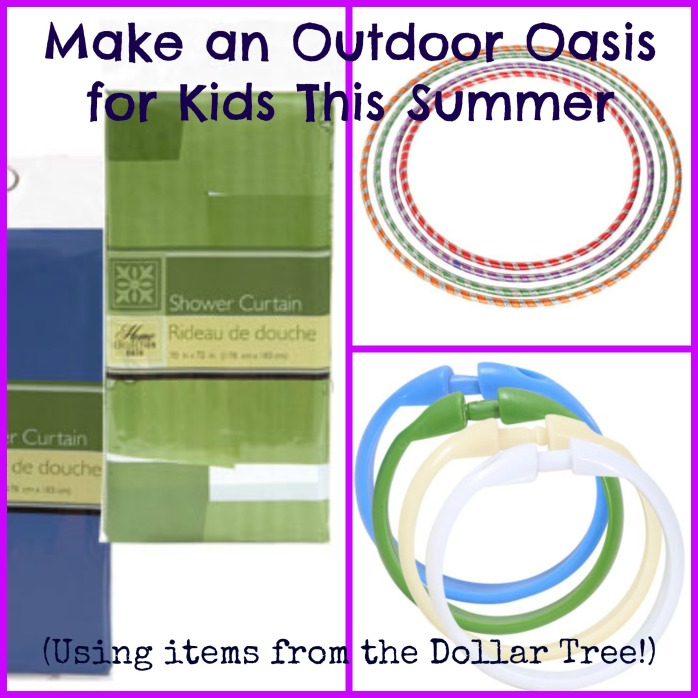
All you need is a hula hoop, a shower curtain, and a pack of shower curtain rings.  For $3 and in only a few minutes you have a fun, inviting outdoor getaway spot!

PicMonkey Collage 2

First you hook the shower curtain to the hula hoop using the rings.  Once every ring has been used, tie the two rings from each end together with some garden twine (or yarn, string, ribbon, whatever you have laying around) to keep the top secure.  I then used the same garden twine to tie the hula hoop down from a tree branch.  Add in a few pillows and a comfy quilt and you have a spot that is begging to be lounged around in.

20140515_233518000_iOS 20140516_002019690_iOS 20140520_000922166_iOS

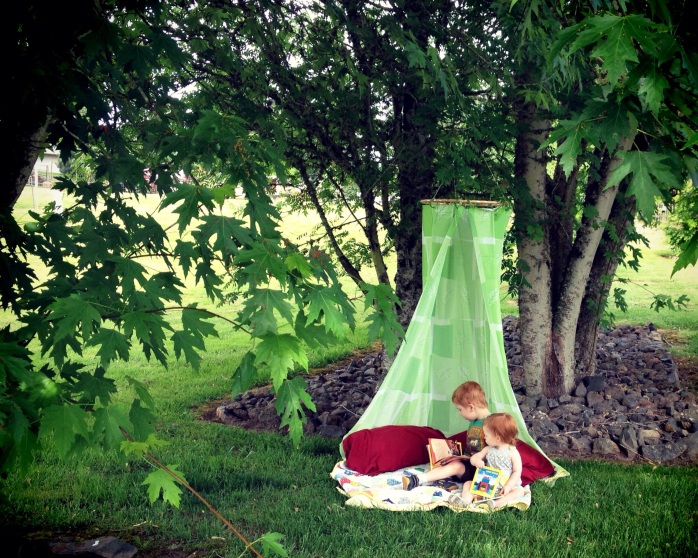
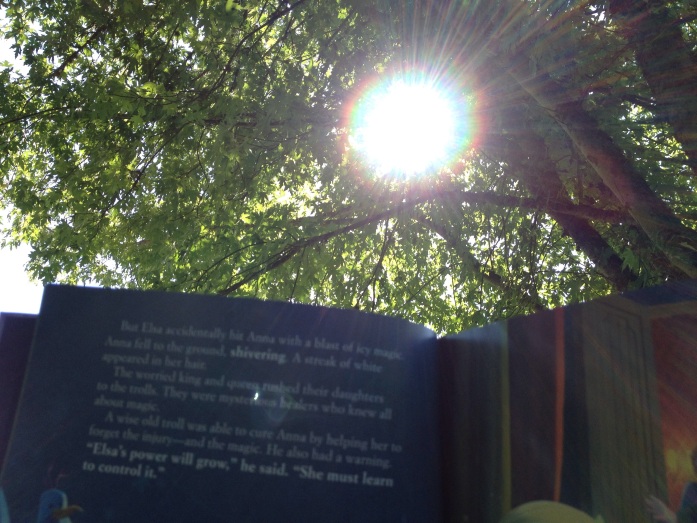
Both of my kids loved this!  I couldn’t believe how much my daughter enjoyed the spot too, given that she’s always on the go and usually wanders around after a book or two.  The first time my kids saw this we sat and read books for over an hour!  My kids never attend to one task for that long.

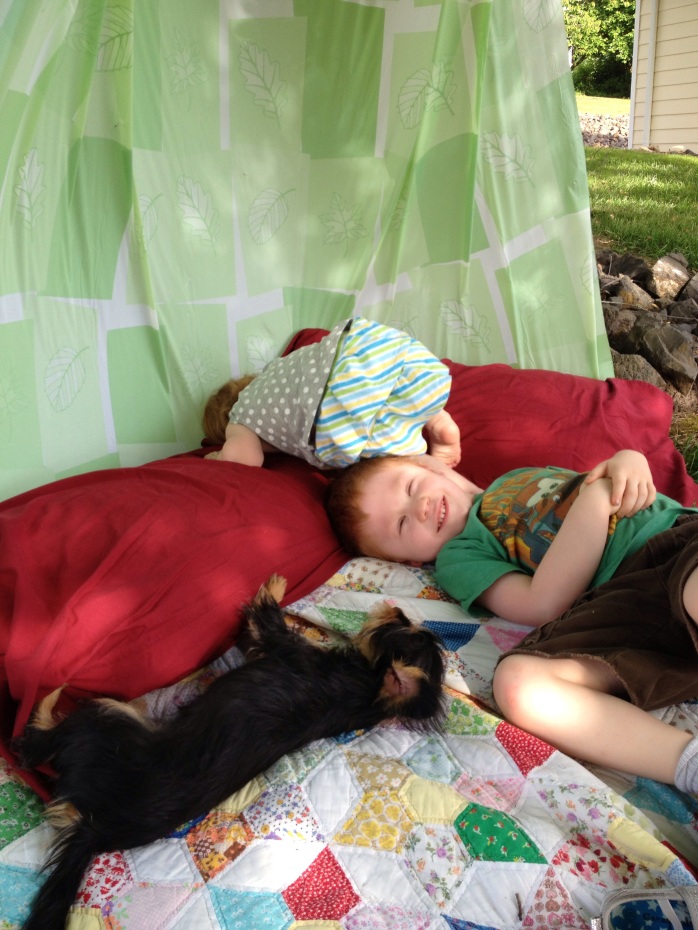
Even our puppy wanted to come play in it!

This is a definite must-do activity to add to that Summer Bucket List!  What are your favorite fun and frugal outdoor activities for kids?

Eyedropper Excavation

Trevor loves baking soda and vinegar activities.  We must do a variation of this classic chemical reaction almost weekly!

For this activity I poured some baking soda into muffin tins, and then added just enough water to make a thick paste.  I buried a few small plastic toys in each spot.  I set the tray out to harden for a few days.

20140531_031710000_iOS

After the discs hardened, I filled a container with vinegar and added an eyedropper.  Eyedroppers are such great tools for strengthening fine motor skills in kids.

20140529_191345000_iOS

20140529_191529000_iOS

After he had loosened up all of the toys through bubbly fun, I gave him a spoon to help scoop the toys out.  (More great fine motor work!)

20140529_191815000_iOS

He had a blast with this activity!  What is your favorite baking soda and vinegar activity?